
1. Ներածություն
This manual provides detailed instructions for the installation, operation, and maintenance of your UHPPOTE 2-Channel Color Quad System Video Splitter. This device is designed to process and display video feeds from up to two analog security cameras, offering various display modes and image adjustments. Please read this manual thoroughly before using the product to ensure proper functionality and safety.
Նշում. This device is only compatible with AHD/TVI analog cameras.
2. Անվտանգության տեղեկատվություն
- Ապահովեք էլեկտրամատակարարման ծավալըtage matches the device's requirements (DC 12V).
- Սարքը մի՛ ենթարկեք խոնավության կամ ծայրահեղ ջերմաստիճանի:
- Խուսափեք սարքը տեղադրել արևի ուղիղ ճառագայթների տակ կամ ջերմության աղբյուրների մոտ:
- Մի փորձեք ինքներդ բացել կամ վերանորոգել սարքը։ Բոլոր սպասարկման աշխատանքները դիմեք որակավորված մասնագետներին։
- Սարքը հեռու պահեք ուժեղ մագնիսական դաշտերից:
3. Փաթեթի բովանդակությունը
Ստուգեք, որ ստորև թվարկված բոլոր ապրանքները ներառված են ձեր փաթեթում.
- 1 x UHPPOTE 2-Channel Video Splitter/Processor
- 1 x Հեռակառավարման վահանակ
- 1 x Անգլերեն Օգտագործողի ձեռնարկ
- 1 x Power Adapter
- 3 x BNC Adapters
4. Ապրանքը ավարտված էview
Առջևի վահանակ
The front panel features control buttons and indicators for managing video inputs and display modes.

Նկար 4.1: Ճակատ view of the video splitter. It displays buttons for MENU, ENTER, A/B, PB, directional arrows, ZOOM, FREEZE, MODE, AUTO, and a POWER switch.
Հետևի վահանակ
The rear panel provides all necessary connection ports for video input, video output, and power.

Նկար 4.2: Հետևի view of the video splitter. It shows two BNC video input ports labeled VIDEO1 and VIDEO2, one BNC monitor output port, and a DC 12V power input jack.
Ներքևում View
The bottom of the device features rubber feet for stability and ventilation holes.
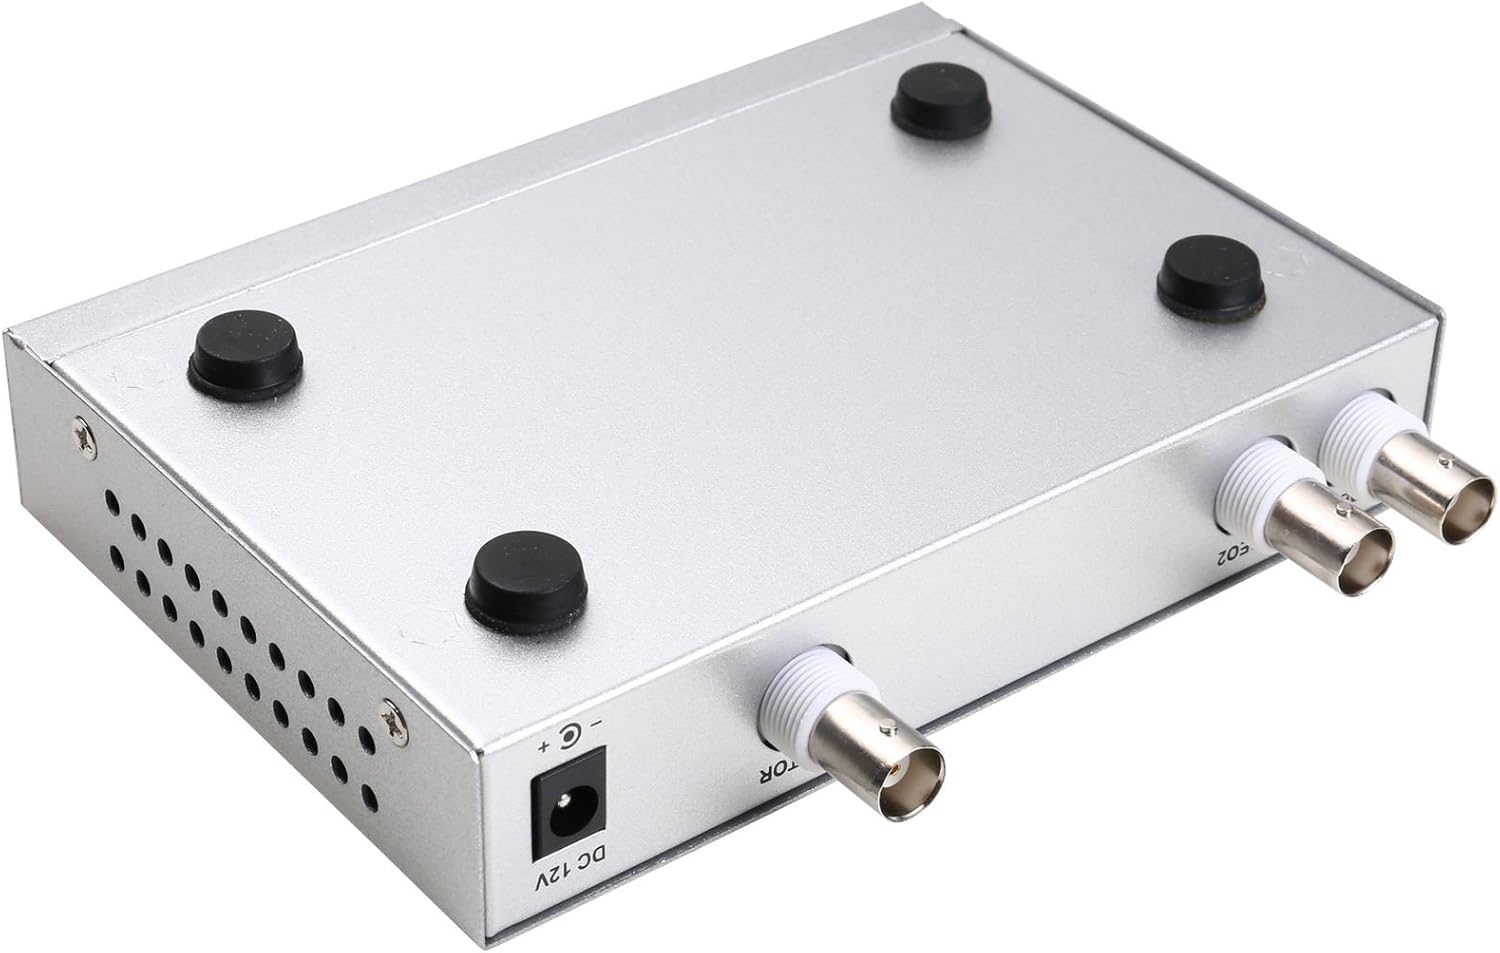
Նկար 4.3: Ներքևում view of the video splitter, highlighting the four rubber feet for stable placement.
Power Adapter
The included power adapter supplies the necessary DC 12V power to the unit.

Նկար 4.4: The power adapter provided with the unit, rated for DC 12V output.
5. Կարգավորում
Follow these steps to connect your video splitter:
- Միացրեք տեսախցիկները՝ Connect your AHD/TVI analog cameras to the VIDEO1 and VIDEO2 BNC input ports on the rear panel of the splitter. Use the provided BNC adapters if necessary.
- Մոնիտորի միացում՝ Connect your display monitor to the MONITOR OUT BNC port on the rear panel.
- Միացրեք հոսանքը. Plug the DC 12V power adapter into the DC 12V input jack on the rear panel, then plug the adapter into a power outlet.
- Միացում՝ Flip the POWER switch on the front panel to the 'ON' position.

Նկար 5.1: Connection schematic. (1) Video input from cameras (CAM1, CAM2) to VIDEO1, VIDEO2. (2) Video output from MONITOR OUT to a display monitor. (3) Power input to DC 12V.
6. Գործառնական հրահանգներ
The video splitter offers various display modes and image adjustment features. Use the front panel buttons or the remote control to operate the device.
6.1. Ցուցադրման ռեժիմներ
Սեղմեք ՌԵԺԻՄ button to cycle through different display layouts:
- Single Channel Display: View one camera feed in full screen (Full 1, Full 2).
- Dual Panoramic Display: View two camera feeds side-by-side (left/right split) or top/bottom split.
- Նկար նկարի մեջ (PIP): View one main camera feed with a smaller inset window of the second camera. PIP positions are switchable (top-left, top-right, bottom-left, bottom-right).
6.2. Պատկերի ճշգրտումներ
You can adjust image parameters for each camera channel:
- Սեղմեք ՄԵՆՈՒ button to access the on-screen display (OSD) menu.
- Use the directional arrow buttons (▲ / ▼ / ◀ / ▶) to navigate through menu options.
- Մամուլ ՄՏՆԵԼ տարբերակ ընտրելու կամ կարգավորումը հաստատելու համար։
- Adjust parameters such as Brightness, Contrast, Saturation, Hue, և Սուրություն for each camera channel individually.
- Մամուլ ՄԵՆՈՒ կրկին OSD ընտրացանկից դուրս գալու համար:
6.3. Հատուկ գործառույթներ
- Սառեցնել: Սեղմեք ՍԱՌԵԼ button to pause the current video frame. Press again to resume live video.
- ZOOM: Սեղմեք ZOOM button to activate electronic zoom. Use the directional arrows to select the enlarged area. Press ZOOM կրկին դուրս գալու համար:
- ԱՎՏՈ Սեղմեք ԱՎՏՈ button to enable auto-cruise mode, which cycles through different camera views or display modes automatically. Each channel can be set for auto-cruise.
- A/B: Switch between camera inputs.
- PB: Playback function (if supported by connected DVR/NVR, otherwise may not be active).
7. Պահպանում
- Մաքրում: Սարքի արտաքին մասը մաքրելու համար օգտագործեք փափուկ, չոր կտոր։ Մի օգտագործեք հեղուկ մաքրող միջոցներ կամ աէրոզոլներ։
- Օդափոխում: Համոզվեք, որ օդափոխության անցքերը չեն խցանված՝ գերտաքացումը կանխելու համար։
- Պահպանում: When not in use for extended periods, store the device in a cool, dry place, away from direct sunlight and dust.
8: Անսարքություն
If you encounter issues with your video splitter, refer to the following common problems and solutions:
- Հզորություն չկա.
- Ստուգեք, թե արդյոք սնուցման ադապտերը ապահով կերպով միացված է սարքին և վարդակիցին։
- Ensure the power switch on the front panel is in the 'ON' position.
- Ստուգեք, որ հոսանքի վարդակից ֆունկցիոնալ է:
- Տեսանյութի ելք չկա.
- Confirm that cameras are properly connected to the VIDEO IN ports.
- Ensure the monitor is correctly connected to the MONITOR OUT port and is powered on.
- Check the video cables for damage or loose connections.
- Verify that the cameras are AHD/TVI analog cameras, as other types are not supported.
- Try cycling through display modes using the MODE button.
- Պատկերի վատ որակ.
- Adjust Brightness, Contrast, Saturation, Hue, and Sharpness settings via the OSD menu.
- Ensure video cables are of good quality and not excessively long.
- Check the camera's own settings and lens focus.
- Հեռակառավարումը չի աշխատում.
- Ստուգեք և փոխարինեք հեռակառավարման մարտկոցները։
- Ensure there are no obstructions between the remote control and the device's IR receiver.
9. Տեխնիկական պայմաններ
| Առանձնահատկություն | Հստակեցում |
|---|---|
| Բրենդ | UHPPOTE |
| Մոդելի համարը | 402 |
| Նյութ | Մետաղական Shell |
| Գույն | Արծաթե |
| Տեսանյութի մուտքագրում | 2-way (BNC) |
| Տեսանյութի ելք | 1-way (BNC) |
| PAL Resolution | 720 x 576 @ 50 Հզ |
| NTSC Resolution | 720 x 480 @ 60 Հզ |
| Նյութի քաշը | 0.88 ֆունտ |
| Համատեղելիություն | AHD/TVI Analog Cameras Only |
10. Երաշխիք և աջակցություն
For warranty information or technical support, please refer to the contact details provided with your purchase or visit the official UHPPOTE webկայք: Պահպանեք ձեր գնման կտրոնը որպես գնման ապացույց՝ երաշխիքային պահանջների դեպքում: