Ներածություն
This manual provides essential instructions for the safe and efficient operation, maintenance, and troubleshooting of your Brother LB7000 Computerized Embroidery and Sewing Machine. Please read this manual thoroughly before using the machine to ensure proper function and to prevent damage.
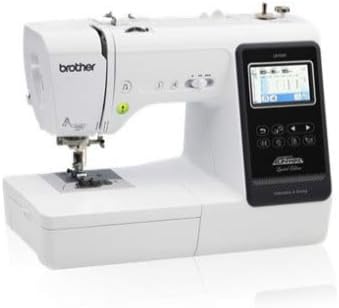
The Brother LB7000 is a versatile machine designed for both sewing and embroidery tasks, offering a range of features to enhance your creative projects.

Image: The Brother LB7000 Computerized Embroidery and Sewing Machine in its standard configuration.
1. Կարգավորում
1.1 Ապափաթեթավորում և տեղադրում
- Զգուշորեն հանեք մեքենան փաթեթավորումից: Պահպանեք բոլոր փաթեթավորման նյութերը հետագա տեղափոխման կամ պահպանման համար:
- Place the machine on a stable, level surface. Ensure adequate space around the machine for comfortable operation and ventilation.
- Միացրեք սնուցման լարը սարքին, ապա՝ համապատասխան էլեկտրական վարդակիցին։
1.2 Attaching the Embroidery Unit
For embroidery functions, the embroidery unit must be attached.
- Համոզվեք, որ մեքենան անջատված է:
- Slide the embroidery unit onto the machine's free arm until it clicks securely into place.
- Turn on the machine. The display will show embroidery mode options.

Image: The Brother LB7000 machine with the embroidery unit and hoop attached, ready for embroidery.
1.3 Մեքենայի թելերի անցկացում
Proper threading is crucial for optimal sewing and embroidery performance.
- Place the spool of thread on the spool pin.
- Հետևեք մեքենայի վրա նշված համարակալված թելերի անցման ուղուն՝ թելը անցկացնելով բոլոր լարվածության սկավառակների և ուղեցույցների միջով։
- Use the automatic needle threader for convenience, or manually thread the needle from front to back.
1.4 Կոճակի փաթաթումը
- Տեղադրեք դատարկ կոճիկը կոճի փաթաթման լիսեռի վրա։
- Թելն անցկացրեք կծիկից ոլորանի փաթաթման լարվածության սկավառակի միջով։
- Wrap the thread around the bobbin a few times, then push the bobbin winder shaft to the right.
- Press the Start/Stop button to begin winding. The machine will stop automatically when the bobbin is full.
2. Գործառնական հրահանգներ
2.1 Basic Sewing Operations
- Selecting Stitches: Use the touch screen display to navigate and select desired utility or decorative stitches.
- Կարգավորումների կարգավորում. Modify stitch length and width using the dedicated buttons or touch screen controls.
- Կարի սկսելը. Place fabric under the presser foot, lower the presser foot, and press the Start/Stop button or use the foot controller.
- Հակադարձ կարում. Press and hold the reverse stitch button to sew in reverse for securing seams.
Պատկեր՝ խոշոր պլան view of the Brother LB7000's control panel and LCD screen, showing sewing stitch selection.
2.2 Embroidery Operations
- Hooping Fabric: Securely place your fabric and stabilizer within the embroidery hoop. Ensure the fabric is taut and wrinkle-free.
- Selecting Designs: Choose from built-in embroidery designs or load designs via USB (if applicable).
- Դիրքորոշում: Use the touch screen to adjust the design's position, rotation, and size within the hoop area.
- Starting Embroidery: Attach the hooped fabric to the embroidery unit. Confirm thread color and press the Start/Stop button. The machine will prompt for thread changes as needed.
3. Պահպանում
3.1 Մեքենայի մաքրում
- Կանոնավոր մաքրում. After each use, or every few hours of operation, remove the needle plate and bobbin case. Use the provided brush to remove lint and dust from the feed dogs and bobbin area.
- Արտաքին մաքրում. Մաքրեք մեքենայի արտաքին մասը փափուկ, չոր կտորով։ Մի օգտագործեք կոշտ քիմիական նյութեր կամ հղկող մաքրող միջոցներ։
3.2 Ասեղի փոխարինում
Replace the needle regularly (approximately every 8-10 hours of sewing) or if it becomes bent, dull, or damaged.
- Անջատեք մեքենան:
- Թուլացրեք ասեղը clamp պտուտակ.
- Remove the old needle and insert a new needle with the flat side facing the back of the machine, pushing it up as far as it will go.
- Ձգեք ասեղը clamp ապահով պտուտակեք:
3.3 Յուղում
The Brother LB7000 is designed to be largely maintenance-free regarding oiling. Do not oil any part of the machine unless specifically instructed by Brother service personnel or an authorized service center. Improper oiling can damage the machine.
4: Անսարքություն
| Խնդիր | Հնարավոր պատճառ | Լուծում |
|---|---|---|
| Մեքենան չի միանում։ | Հոսանքի լարը ճիշտ միացված չէ։ | Check power cord connection to machine and outlet. Ensure outlet is functional. |
| Upper thread breaks. | Incorrect threading, needle bent/dull, tension too high, poor quality thread. | Re-thread the machine correctly. Replace needle. Adjust upper thread tension. Use good quality thread. |
| Բաց թողնված կարեր. | Incorrect needle type/size, bent needle, improper threading. | Use appropriate needle for fabric. Replace needle. Re-thread machine. |
| Գործվածքից ջեմեր. | Incorrect presser foot, feed dogs not engaged, fabric too thick/thin. | Use correct presser foot. Ensure feed dogs are up. Use appropriate needle and stabilizer for fabric. |
| Poor embroidery quality. | Improper hooping, wrong stabilizer, incorrect tension, dull needle. | Re-hoop fabric tautly. Use correct stabilizer for fabric and design. Adjust tension. Replace needle. |
5. Տեխնիկական պայմաններ
| Առանձնահատկություն | Մանրամասն |
|---|---|
| Բրենդ | Եղբայր |
| Մոդելի համարը | LB7000 |
| Էլեկտրաէներգիայի աղբյուր | Լարով էլեկտրական |
| Էլեկտրական է | Այո՛ |
| UPC | 012502649830 |
| GTIN | 012502649830 |
6. Երաշխիք և աջակցություն
For detailed warranty information, please refer to the warranty card included with your product or visit the official Brother webկայք։ Պահպանեք ձեր գնման ապացույցը երաշխիքային պահանջների համար։
If you encounter issues not covered in this troubleshooting section or require technical assistance, please contact Brother Customer Support. You can find contact information on the official Brother webկայքի կամ միջոցով Brother խանութ Amazon-ում.