staniot H501-WiFi
Staniot H501-WiFi Home Alarm System User Manual
Model: H501-WiFi | Brand: Staniot
1. Ներածություն
Welcome to the Staniot H501-WiFi Home Alarm System. This comprehensive security kit is designed to provide reliable and intelligent protection for your home or office. Featuring an intuitive touch screen panel, seamless app control, and compatibility with smart home assistants, this system offers enhanced security and peace of mind. This manual will guide you through the setup, operation, and maintenance of your new security system.

Figure 1: Staniot H501-WiFi Home Alarm System components including the main panel, door/window sensors, SOS button, motion detector, and remote controls.
2. Անվտանգության կարևոր տեղեկատվություն
Please read all safety instructions carefully before installing and operating the system. Failure to follow these instructions may result in damage to the device or personal injury.
- Ensure the system is installed in a dry environment, away from water and excessive humidity.
- Մի փորձեք ինքներդ ապամոնտաժել կամ վերանորոգել սարքը։ Բոլոր սպասարկման աշխատանքները դիմեք որակավորված մասնագետներին։
- Use only the provided power adapter for the main panel.
- Keep small components and batteries out of reach of children.
- Verify that all sensors are securely mounted to prevent accidental detachment.
- Only connect to a 2.4 GHz WiFi network. 5 GHz networks are not supported.
3. Փաթեթի բովանդակությունը
Փաթեթը բացելուց հետո, խնդրում ենք ստուգել, որ ստորև թվարկված բոլոր իրերը ներառված են ձեր փաթեթում.
- 1 x Security Panel (Main Control Unit)
- 4 x Entry Sensors (Door/Window Sensors)
- 1 x SOS Button
- 2 x հեռակառավարման վահանակ
- 1 x լարային սիրեն
- 1 x PIR Motion Detector
- 1 x Power Adapter for Main Panel
- Mounting Hardware (screws, adhesive pads)
- Օգտագործողի ձեռնարկ (այս փաստաթուղթը)

Figure 2: Visual representation of the 10-piece alarm kit contents.
4. Կարգավորման ուղեցույց
4.1. Main Panel Installation
- Միացում՝ Connect the provided power adapter to the main security panel and plug it into a wall outlet. The panel will power on and display the Staniot Home UI 2.0 interface.
- Networkանցային կապ
- On the panel, navigate to the Wi-Fi settings.
- Ընտրեք ձեր 2.4 ԳՀց Wi-Fi ցանցը և մուտքագրեք գաղտնաբառը:
- Ensure the panel is connected to the internet for app control and updates.
- Ծրագրի ներբեռնումը. Download the "Smart Life" app from your smartphone's app store (iOS App Store or Google Play Store). Register an account if you don't have one.
- Հավելվածի հետ զուգակցում.
- Open the Smart Life app and follow the on-screen instructions to add a new device.
- Select "Security & Video Surveillance" -> "Alarm (Wi-Fi)".
- Follow the app's guide to connect the panel. This usually involves putting the panel into pairing mode.

Figure 3: The sleek design of the Staniot security panel, highlighting its ultra-thin profile and connectivity ports.
4.2. Sensor and Accessory Installation
The system supports up to 200 accessories. Each accessory comes with adhesive pads or screws for easy installation.
- Entry Sensors (Door/Window):
- Mount the two parts of the entry sensor on a door or window frame, ensuring they are aligned and within 1 cm of each other when the door/window is closed.
- Use the provided adhesive or screws for secure mounting.
- Test by opening and closing the door/window; the sensor's indicator light should flash.

Figure 4: Proper placement and activation of an entry sensor.
- PIR շարժման դետեկտոր՝
- Install the motion detector in a corner or on a wall where it can cover the desired area without obstructions. Avoid direct sunlight or heat sources.
- Mount at a height of approximately 2.2-2.4 meters (7-8 feet) for optimal detection range.
- Test by walking through the detection area; the indicator light should activate.

Figure 5: The motion detector's 110-degree detection range.
- SOS կոճակ. Place the SOS button in an easily accessible location, such as a bedside table or near an exit.
- Հեռակառավարման վահանակներ. No installation needed. Keep them handy for quick arming/disarming.
- Wired Siren: Connect the wired siren to the designated siren port on the main panel. Mount it in a visible location for maximum deterrent effect.
4.3. Adding Accessories to the System
After physical installation, you need to add each accessory to the main panel and the Smart Life app.
- On the main panel, navigate to "Menu" -> "Accessories" -> "Add Accessory".
- Trigger the accessory (e.g., open an entry sensor, wave in front of the motion detector, press the SOS button). The panel will detect and add the accessory.
- You can customize the name of each accessory in the Smart Life app for easier identification (e.g., "Front Door Sensor", "Living Room Motion").
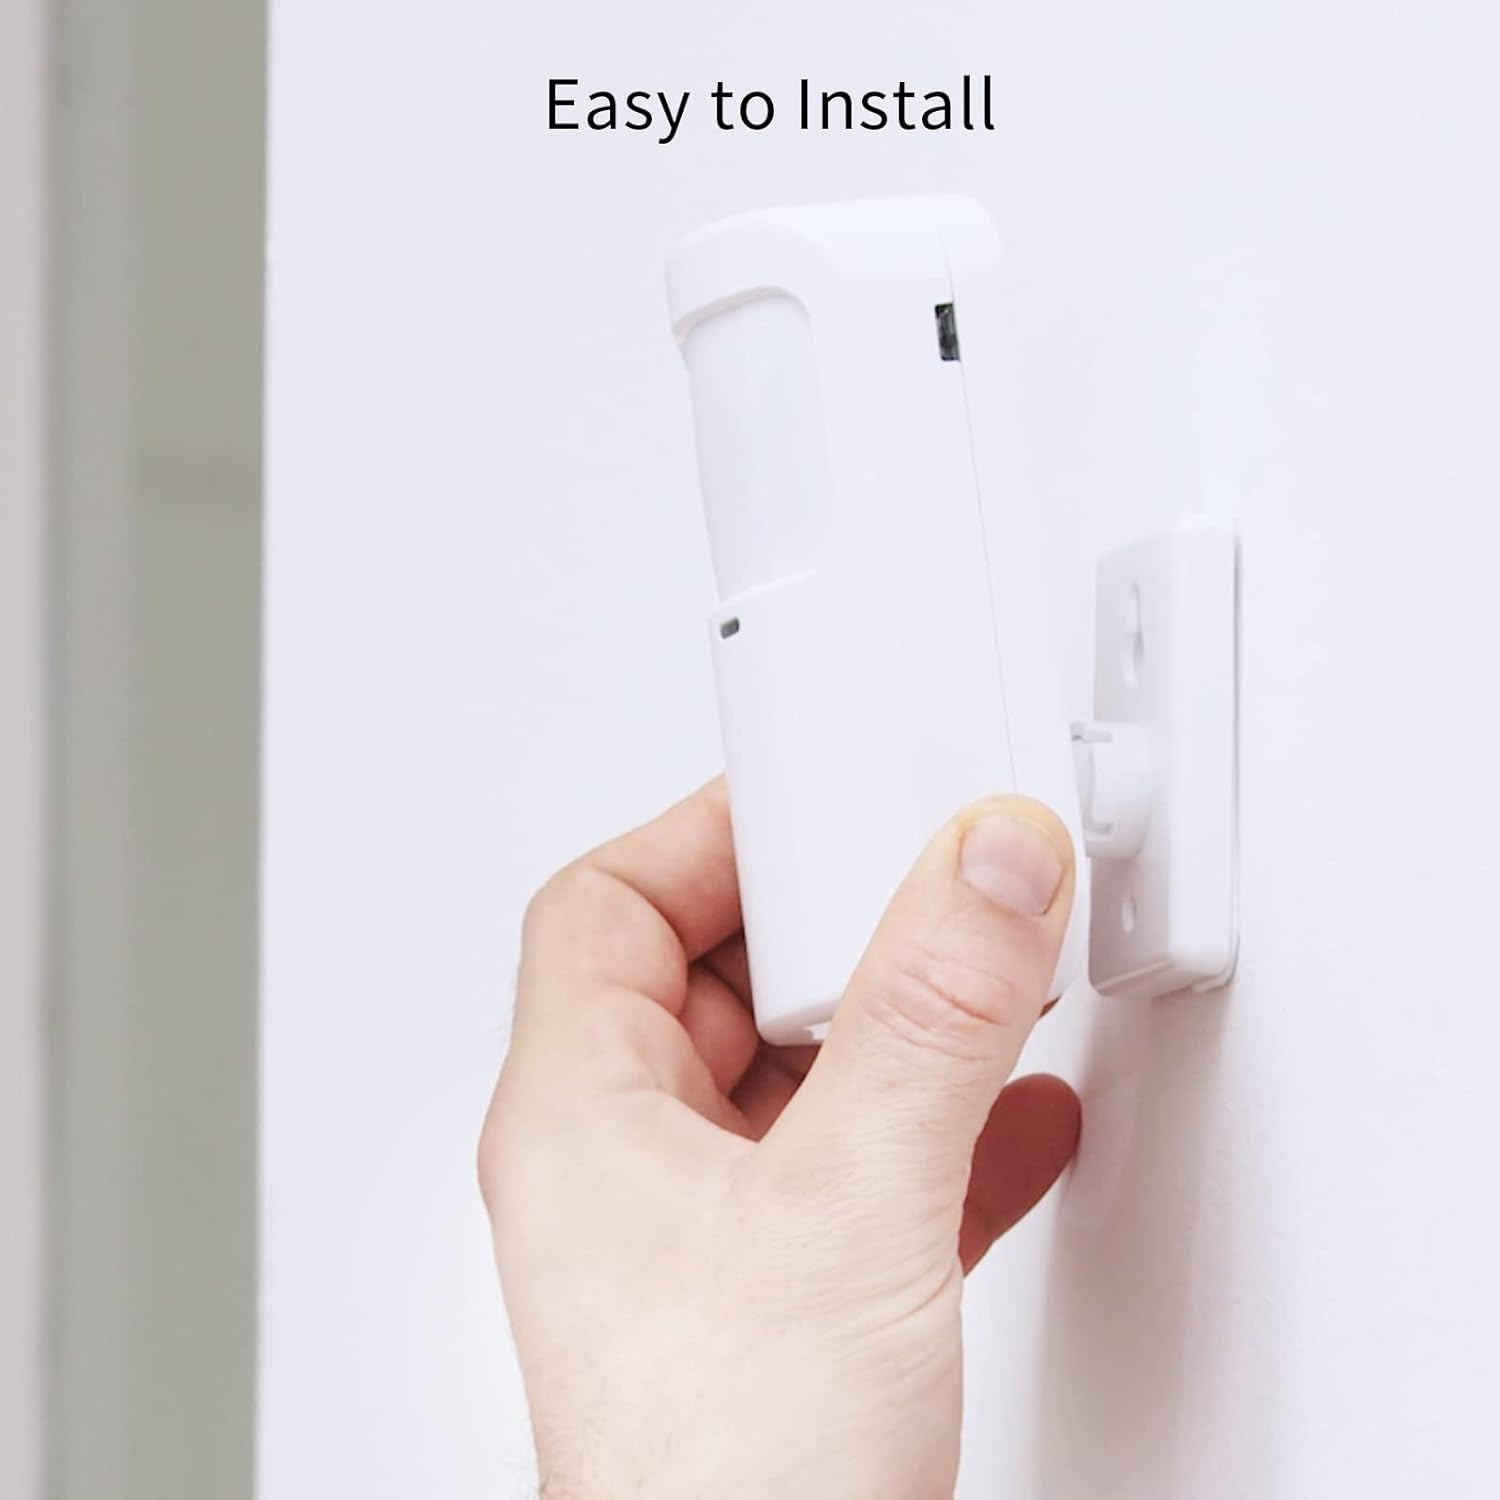
Figure 6: Simple installation process for the motion sensor.
5. Ձեր համակարգի շահագործումը
5.1. Զինում և զինաթափում
The Staniot system offers multiple ways to arm and disarm your security system:
- Գլխավոր վահանակ՝ Use the touch screen to select "Away Arm" (full protection), "Stay Arm" (perimeter protection, internal sensors off), or "Disarm".
- Հեռակառավարման վահանակ. Press the respective buttons on the remote control for quick arming/disarming.
- Smart Life հավելված. Control the system remotely from your smartphone. You can set alarm modes and monitor accessory status.
- Ձայնային կառավարում (Alexa/Google Assistant): Integrate with Amazon Alexa or Google Assistant for voice commands.
- Enable the "Smart Life" skill in your Alexa or Google Home app.
- Link your Smart Life account.
- Use commands like "Alexa, arm the security system" or "Hey Google, disarm the alarm."

Figure 7: Voice control integration with Alexa and Google Assistant.
5.2. Instant App Notifications
When an alarm is triggered, you will receive instant notifications on your smartphone via the Smart Life app. This allows you to monitor your home's security status in real-time, even when you are away.

Figure 8: Real-time alarm notifications on your mobile device.
5.3. SOS ֆունկցիա
In case of an emergency, pressing the SOS button will immediately trigger the alarm and send alerts to pre-set emergency contacts via the app.

Figure 9: The SOS button provides immediate assistance in emergencies.
6. Պահպանում
- Մարտկոցի փոխարինում. Replace batteries in sensors and remote controls as needed. The Smart Life app may notify you of low battery levels.
- Մաքրում: Wipe the main panel and sensors with a soft, dry cloth. Avoid using abrasive cleaners or solvents.
- Ներկառուցված ծրագրի թարմացումներ (OTA): The system supports Over-The-Air (OTA) online upgrades. Regularly check for and install updates via the Smart Life app to ensure optimal performance and access to new features.

Figure 10: Seamless online firmware updates for continuous system improvement.
- Համակարգի ստուգումներ. Periodically test all sensors and the siren to ensure they are functioning correctly.
7: Անսարքություն
| Խնդիր | Հնարավոր պատճառ | Լուծում |
|---|---|---|
| Panel not connecting to Wi-Fi. | Incorrect Wi-Fi password; 5 GHz network selected; weak signal. | Double-check password. Ensure you are connecting to a 2.4 GHz network. Move panel closer to router. |
| Sensors not triggering alarm. | Sensor battery low; sensor not paired; improper installation. | Replace sensor battery. Re-pair sensor with panel. Ensure proper alignment and proximity for entry sensors. |
| Հավելվածի ծանուցումներ չկան։ | App permissions not granted; phone's notification settings disabled; panel not connected to internet. | Check app permissions in phone settings. Enable notifications for Smart Life app. Verify panel's internet connection. |
| Ձայնային կառավարումը չի աշխատում։ | Smart Life skill not enabled/linked; incorrect voice commands. | Ensure Smart Life skill is enabled and linked in Alexa/Google Home app. Use precise commands. |
| Siren not sounding. | Siren not connected; siren volume set too low. | Check siren connection to the main panel. Adjust siren volume settings on the panel. |
If you encounter issues not listed here, please refer to the support section or contact customer service.
8. Տեխնիկական պայմաններ
| Առանձնահատկություն | Մանրամասն |
|---|---|
| Մոդելի համարը | H501-WiFi |
| Բրենդ | Staniot |
| Dimensions (Panel) | 21.59 x 16.51 x 7.37 սմ (8.5 x 6.5 x 2.9 դյույմ) |
| Քաշը | 912 գրամ (2.01 ֆունտ) |
| Էլեկտրաէներգիայի աղբյուր | Մարտկոցով աշխատող (ներառված է 1 լիթիում-իոնային մարտկոց) |
| Հատtage | 5 վոլտ |
| Միացման տեխնոլոգիա | Անլար (միայն 2.4 ԳՀց Wi-Fi) |
| Վերահսկման մեթոդ | Application, Touch Screen, Remote Control, Voice Control |
| Համատեղելի սարքեր | Smartphone (Smart Life App), Amazon Alexa, Google Assistant |
| Max Accessories Supported | Մինչև 200 |
| Նյութ | ABS |
| Հավաստագրեր | CE, UKCA, FCC |
9. Երաշխիք և աջակցություն
9.1. Երաշխիքային տեղեկատվություն
Staniot products come with a standard manufacturer's warranty. Please refer to the warranty card included in your package or visit the official Staniot webՄանրամասն երաշխիքային պայմանների և դրույթների համար այցելեք կայքը: Պահպանեք ձեր գնման կտրոնը որպես գնման ապացույց՝ երաշխիքային պահանջների համար:
9.2. Հաճախորդների աջակցություն
For technical assistance, troubleshooting, or any questions regarding your Staniot Home Alarm System, please contact our customer support team. We are committed to providing prompt and helpful service.
- Առցանց աջակցություն. Visit the Staniot official webԿայք՝ հաճախակի տրվող հարցերի, օժանդակ հոդվածների և կապի ձևերի համար։
- Էլփոստի աջակցություն. Դիմեք ձեր ապրանքի փաթեթավորմանը կամ պաշտոնական webկայքը հաճախորդների աջակցության էլեկտրոնային փոստի հասցեի համար։
- Հեռախոսային աջակցություն. Ստուգեք պաշտոնականը webկայքում՝ հասանելի հեռախոսահամարների և աշխատանքային ժամերի համար։
Your satisfaction is our primary goal. If you encounter any problems, please contact us first, and we will resolve the issue for you as soon as possible.