
1. Ներածություն
Շնորհակալություն գնման համարasing the Monitech Mo-S200-US-RE-CF3 Digital Camera. This camera is designed to capture high-quality photos and 4K videos, featuring a 64-megapixel sensor, 16x digital zoom, and a 3-inch flip screen. This manual provides detailed instructions for setup, operation, maintenance, and troubleshooting to ensure optimal performance and longevity of your device.
Please read this manual thoroughly before using the camera and keep it for future reference.
2. Անվտանգության տեղեկատվություն
- Տեսախցիկը մի՛ ենթարկեք ջրի կամ խոնավության:
- Խուսափեք տեսախցիկը գցելուց կամ այն ուժեղ հարվածներից ենթարկելուց։
- Keep the camera away from direct sunlight and high temperatures.
- Use only Monitech approved accessories, including batteries and chargers.
- Մի՛ փորձեք ապամոնտաժել կամ փոփոխել տեսախցիկը։ Սա կչեղարկի երաշխիքը։
- Պահել երեխաներից հեռու:
3. Փաթեթի բովանդակությունը
Ստուգեք, որ բոլոր իրերը առկա են ձեր փաթեթում.
- Monitech Mo-S200-US-RE-CF3 Digital Camera (Model S205)
- Rechargeable Lithium Ion Batteries (x2)
- Մարտկոցի լիցքավորիչ
- 32GB TF Card (Memory Card)
- USB մալուխ
- Միկրոֆոն
- Օգտագործողի ձեռնարկ (այս փաստաթուղթը)
4. Տեսախցիկն ավարտված էview
Ծանոթացեք ձեր տեսախցիկի հիմնական բաղադրիչներին։
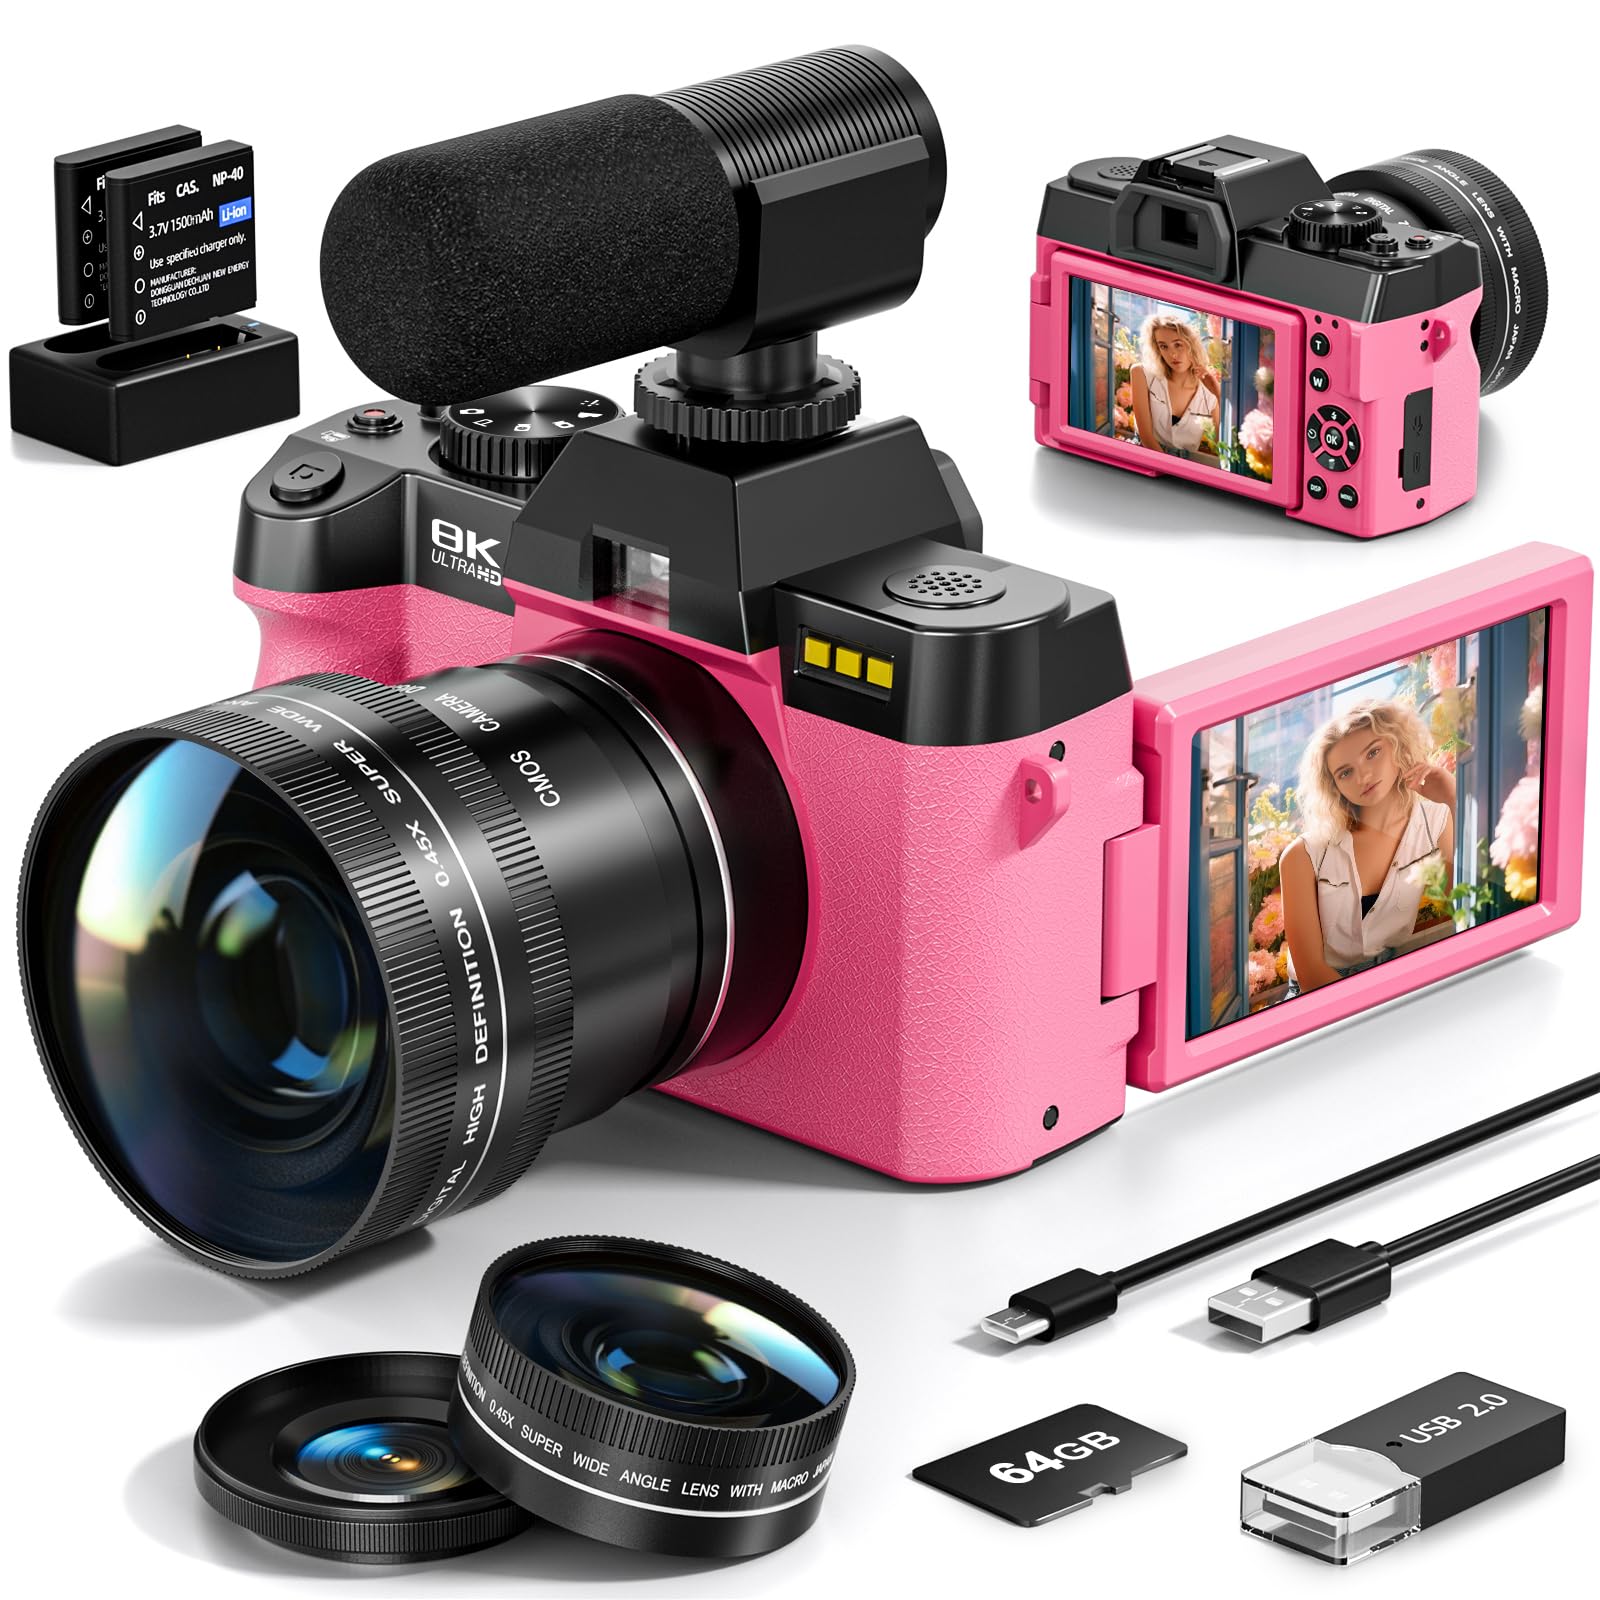
Նկար 1. Առջև view of the Monitech Mo-S200-US-RE-CF3 Digital Camera with the 3-inch flip screen extended. This image shows the lens, flash, and control buttons.
Հիմնական բաղադրիչներ.
- Ոսպնյակներ: Պատկերի ֆիքսման հիմնական օպտիկական բաղադրիչը։
- Flash: Ապահովում է լուսավորություն թույլ լուսավորության պայմաններում։
- 3-inch IPS Flip Screen: Կադրավորման կադրերի համար, վերստինviewing images, and vlogging.
- Power կոճակը. Միացնում/անջատում է տեսախցիկը։
- Կափարիչի կոճակ. Captures photos.
- Ռեժիմի հավաքում. Ընտրում է նկարահանման ռեժիմներ (օրինակ՝ լուսանկար, տեսանյութ):
- Մեծացման լծակ՝ Controls the 16x digital zoom.
- Նավիգացիոն կոճակներ. Մենյուի նավարկության և կարգավորումների ճշգրտման համար։
- Մարտկոցի խցիկ. Տեղադրում է լիցքավորվող մարտկոցը։
- Հիշողության քարտի բնիկ. For inserting the TF card.
- USB պորտ. For charging, data transfer, and PC camera function.
- HDMI պորտ. For connecting to a larger display.
- Խոսափողի մուտքագրում. Արտաքին միկրոֆոն միացնելու համար։
5. Կարգավորում
5.1. Մարտկոցի լիցքավորում
- Insert one of the provided Lithium Ion batteries into the battery charger.
- Connect the charger to a power source using the USB cable.
- The indicator light on the charger will show charging status. Charge until the light indicates a full charge.
- Լրիվ լիցքավորումը սովորաբար տևում է մոտ 2-3 ժամ։
5.2. Մարտկոցի տեղադրում
- Բացեք մարտկոցի խցիկի կափարիչը, որը գտնվում է տեսախցիկի ներքևի մասում։
- Insert a fully charged battery, ensuring the correct orientation as indicated inside the compartment.
- Ապահով փակեք մարտկոցի խցիկի կափարիչը:
5.3. Installing the Memory Card (TF Card)
- Locate the memory card slot, usually on the side or bottom of the camera.
- Insert the provided 32GB TF card into the slot with the metal contacts facing the correct direction (refer to the diagram near the slot).
- Push the card gently until it clicks into place. To remove, push it in again until it springs out.
5.4. Սկզբնական միացում և կարգավորումներ
- Սեղմեք և պահեք միացման կոճակը՝ տեսախցիկը միացնելու համար։
- Upon first use, you may be prompted to set the date, time, and language. Follow the on-screen instructions using the navigation buttons.
- It is recommended to format the memory card before first use. Navigate to the camera's menu, find the "Format" option, and confirm.
6. Գործառնական հրահանգներ
6.1. Basic Photography (Photo Mode)
- Միացրեք տեսախցիկը:
- Ensure the mode dial is set to Photo mode (usually indicated by a camera icon).
- Frame your shot using the 3-inch flip screen.
- Press the Shutter button halfway down to focus. The autofocus system will lock onto the subject.
- Press the Shutter button fully down to capture the photo.
6.2. Video Recording (Video Mode)
- Միացրեք տեսախցիկը:
- Set the mode dial to Video mode (usually indicated by a video camera icon).
- Press the Shutter button (or dedicated video record button if available) to start recording.
- Կրկին սեղմեք կոճակը՝ ձայնագրումը դադարեցնելու համար:
- The camera supports 4K video resolution and H264-H.265 encoding.
6.3. Using the 16x Digital Zoom
Use the zoom lever (often around the shutter button) to zoom in or out. Push the lever in one direction to zoom in and the other to zoom out. The 16x digital zoom allows for close-up shots from a distance.
6.4. Utilizing the 3-inch Flip Screen
The IPS flip screen can be rotated to various angles, including facing forward, which is ideal for vlogging and self-portraits. Adjust the screen to your desired viewing angle for optimal framing and review.
6.5. Adjusting Settings (Flash, ISO, etc.)
Access the camera's menu system using the menu button. From here, you can adjust various settings:
- Flash: Control flash modes (Auto, On, Off, Red-eye reduction).
- ISO: Adjust light sensitivity for different lighting conditions.
- Ազդեցության փոխհատուցում. Brighten or darken your images.
- Սպիտակ հավասարակշռություն. Կարգավորել գույնի ջերմաստիճանը:
- Նկարահանման ռեժիմներ. Explore versatile shooting models such as Time-lapse, Continuous Shooting, Fast Motion, and Slow Motion.
6.6. Connecting to a PC (Webcam Function)
- Միացրեք տեսախցիկը ձեր համակարգչին `օգտագործելով USB մալուխ:
- On the camera screen, select the "PC Camera" or "Webcam" option if prompted.
- Your computer should recognize the camera as a webcam, allowing you to use it for video calls or streaming.
6.7. WiFi and App Transfer
The camera supports WiFi connectivity for transferring photos and videos to your mobile phone. Refer to the camera's on-screen instructions or a dedicated app manual for detailed steps on connecting via WiFi and using the companion app for data transfer.
6.8. HDMI ելք
Connect the camera to a larger screen (e.g., TV or monitor) using an HDMI cable (not included). This allows you to view your photos and videos on a bigger display.
7. Պահպանում
7.1. Տեսախցիկի մաքրում
- Օգտագործեք փափուկ, թել չթողնող կտոր՝ տեսախցիկի կորպուսը մաքրելու համար։
- For the lens and screen, use a specialized lens cleaning cloth and solution. Do not use abrasive materials or harsh chemicals.
- Gently blow away dust from the lens surface before wiping.
7.2. Պահպանում
- Երկար ժամանակ չօգտագործելու դեպքում հանեք մարտկոցը տեսախցիկից։
- Պահեք տեսախցիկը զով, չոր տեղում, արևի ուղիղ ճառագայթներից և ծայրահեղ ջերմաստիճաններից հեռու։
- Consider using a camera bag or case for protection against dust and impacts.
8: Անսարքություն
| Խնդիր | Հնարավոր պատճառ | Լուծում |
|---|---|---|
| Տեսախցիկը չի միանում։ | Մարտկոցը սպառվել է կամ սխալ է տեղադրված։ | Համոզվեք, որ մարտկոցը լիովին լիցքավորված է և ճիշտ տեղադրված։ |
| Հնարավոր չէ լուսանկարներ/տեսանյութեր անել։ | Memory card full, not inserted, or corrupted. | Check memory card. Delete unnecessary files, insert correctly, or format (backup data first). |
| Պատկերները մշուշոտ են: | Lens is dirty, insufficient light, or camera shake. | Clean lens. Use flash or increase ISO in low light. Hold camera steady. |
| Տեսախցիկը կախվում է։ | Ծրագրային ապահովման խափանում կամ մարտկոցի խնդիր։ | Remove and reinsert the battery to reset. If problem persists, contact support. |
9. Տեխնիկական պայմաններ
| Մոդելի անվանումը | S205 |
| Բրենդ | Monitech |
| Արդյունավետ դեռ լուծում | 64 պատգամավոր |
| Առավելագույնը Webտեսախցիկի պատկերի լուծում | 64 պատգամավոր |
| Տեսանյութի բանաձեւ | 4K UHD |
| Թվային խոշորացում | 16x |
| Էկրանի տեսակը | 3-inch IPS Flip Screen |
| Ֆոտո սենսորային տեխնոլոգիա | CMOS |
| Լուսանկարի սենսորի չափը | 1/2 դյույմ |
| Աջակցված է File Ձևաչափ | JPEG (for photos), H264-H.265 (for video) |
| Լուսավորման վերահսկման տեսակը | Ձեռնարկ |
| Համատեղելի ամրացումներ | Միկրո չորս երրորդ |
| Ձևի գործոն | Կոմպակտ |
| Մարտկոցներ | Պահանջվում է 2 Lithium Ion մարտկոց |
| Ծանրոցների չափերը | 15.24 x 12.7 x 7.62 սմ |
| Նյութի քաշը | 226.8 գ |
10. Երաշխիք և աջակցություն
Monitech products are designed for reliability and performance. For warranty information, please refer to the warranty card included with your purchase or visit the official Monitech website. If you encounter any issues or require technical assistance, please contact Monitech customer support through the contact details provided on our webկայքում կամ ձեր ապրանքի փաստաթղթերում։
Խնդրում ենք աջակցության ծառայությանը դիմելիս պատրաստ ունեցեք ձեր մոդելի համարը (S205) և գնման ամսաթիվը։