1. Ներածություն
Thank you for choosing the Zopsc 1080P HD Digital Camera. This manual provides essential information for setting up, operating, and maintaining your camera. Please read it thoroughly before use to ensure optimal performance and longevity of your device.
This compact digital camera is designed for ease of use, featuring 1080P video recording, 50MP photo capabilities, a 2.8-inch TFT screen, 16x digital zoom, and a built-in LED flash, making it suitable for various photography needs.
2. Ապրանքը ավարտված էview
2.1 Հիմնական հատկանիշները
- High Definition Imaging: Capture 50MP still images and record 1080P high-definition videos.
- 2.8 դյույմանոց TFT էկրան՝ View your shots and navigate menus with clarity.
- 16x Digital Zoom & Autofocus: Achieve precise focus and zoom in on distant subjects.
- Ներկառուցված LED լապտեր. Illuminate subjects in low-light conditions for clear photos and videos.
- Բազմակողմանի գործառույթներ. Includes playback, fill light, time-lapse video, slow motion, continuous shooting, and auto timer (2s, 5s, 10s).
- Պատկերի բարելավում. Supports exposure compensation, white balance adjustment, ISO settings, and anti-shake functionality.
- Կոմպակտ և շարժական. Lightweight design for easy carrying and travel.
2.2 Փաթեթի բովանդակությունը
Խնդրում ենք ստուգել, որ ձեր փաթեթում ներառված են հետևյալ բոլոր ապրանքները.
- Zopsc Digital Camera
- Տեղափոխման պայուսակ
- Charging Data Cable (USB)
- Ձեռքի ժապավեն
- Օգտագործողի ձեռնարկ (այս փաստաթուղթը)
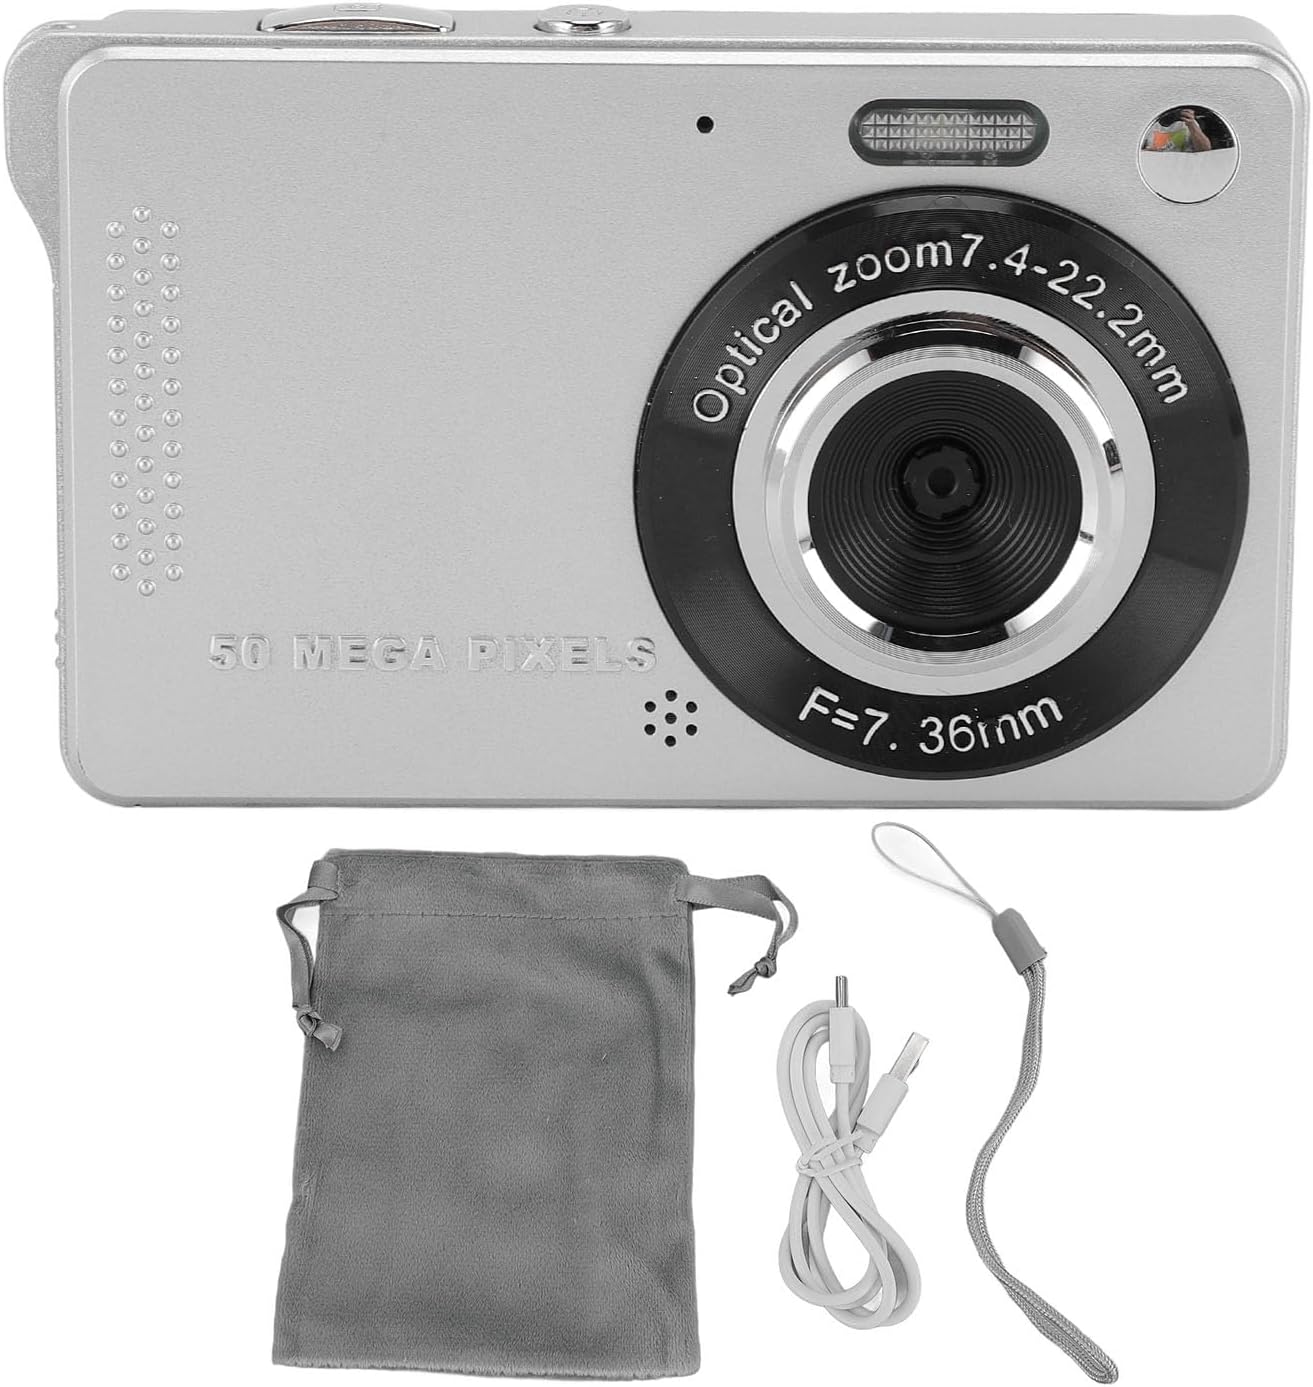
Image: The Zopsc Digital Camera shown with its included accessories: a gray carrying pouch, a white USB charging cable, and a gray hand strap.
3. Տեսախցիկի մասեր և կառավարման տարրեր
Familiarize yourself with the camera's layout and controls:
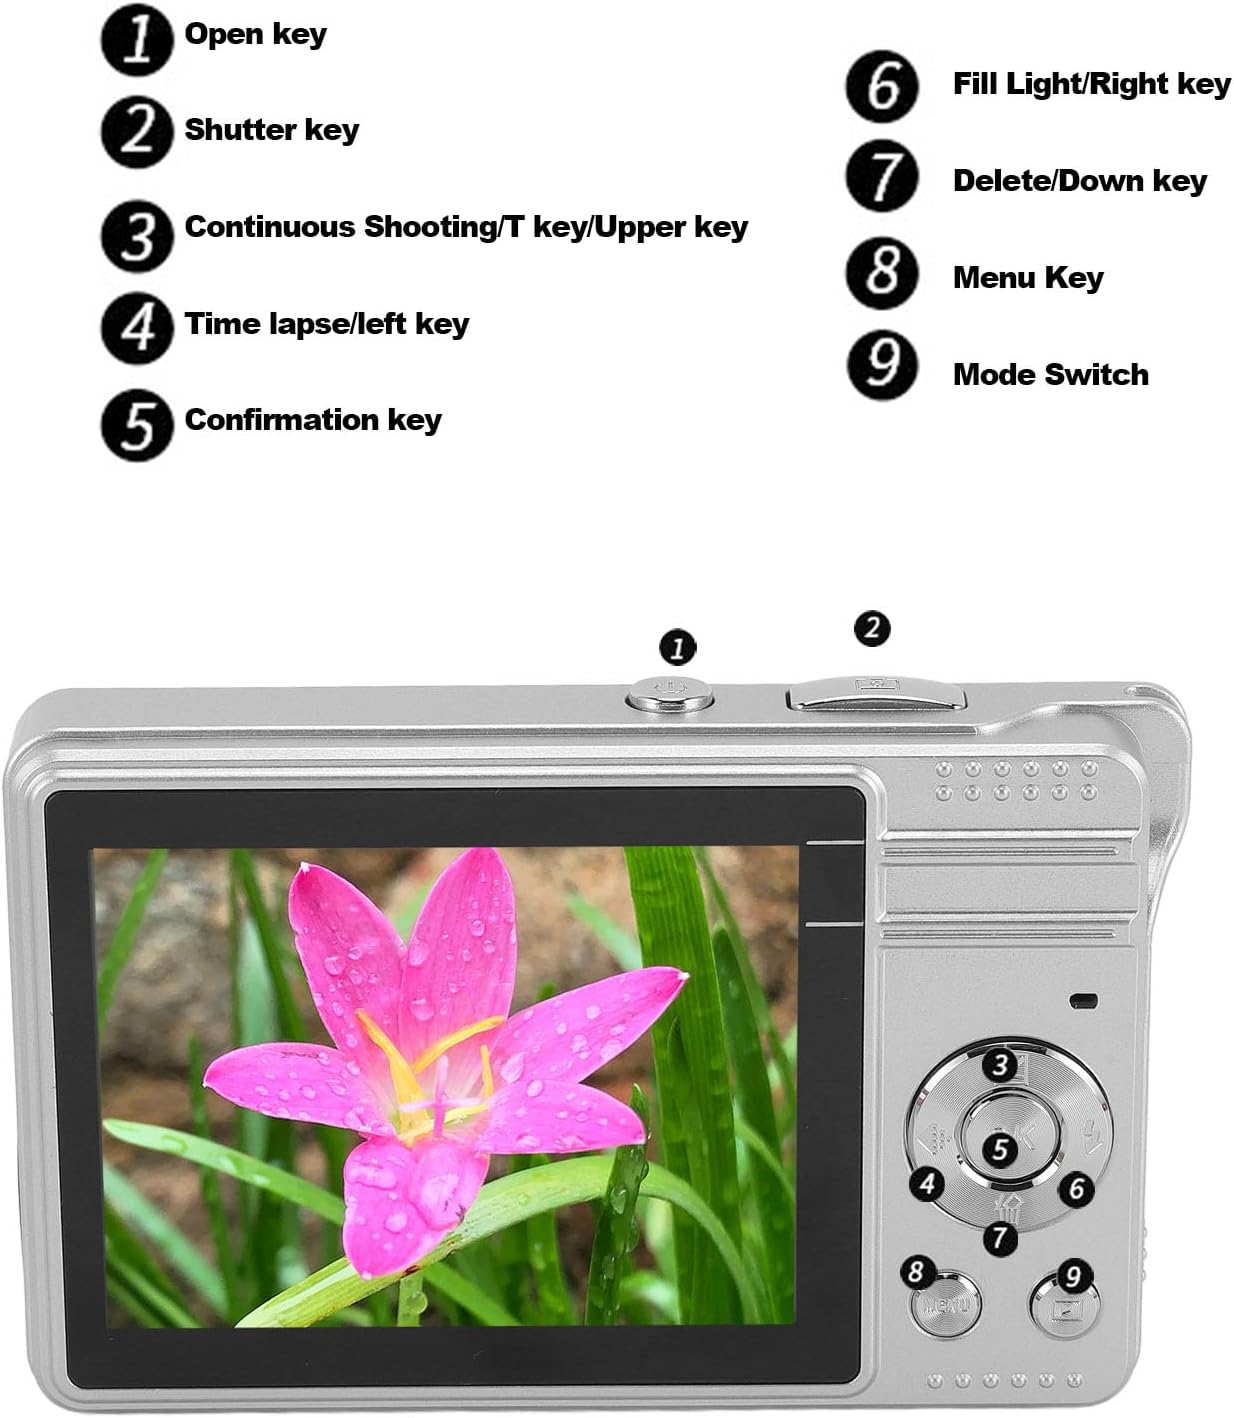
Image: A diagram illustrating the camera's buttons and their corresponding functions. Keyed numbers point to: 1. Open key, 2. Shutter key, 3. Continuous Shooting/T key/Upper key, 4. Time lapse/left key, 5. Confirmation key, 6. Fill Light/Right key, 7. Delete/Down key, 8. Menu Key, 9. Mode Switch.
- Բացել բանալի. Powers the camera on or off.
- Shutter Key: Սեղմեք՝ լուսանկարելու կամ տեսաձայնագրումը սկսելու/դադարեցնելու համար։
- Continuous Shooting/T Key/Upper Key: Activates continuous shooting mode, controls zoom in (Telephoto), or navigates up in menus.
- Time Lapse/Left Key: Activates time-lapse mode or navigates left in menus.
- Confirmation Key: Հաստատում է ընտրանքները ընտրացանկերում։
- Fill Light/Right Key: Toggles the LED fill light or navigates right in menus.
- Delete/Down Key: Ջնջում է ընտրվածը files or navigates down in menus.
- Uանկի բանալին: Accesses the camera's settings menu.
- Ռեժիմի փոխարկիչ. Changes between photo, video, and playback modes.

Պատկեր՝ խոշոր պլանով view of the Zopsc Digital Camera, highlighting the USB port and the memory card slot (labeled TF for TransFlash/microSD).
4. Կարգավորում
4.1 Մարտկոցի լիցքավորում
- Locate the USB port on the side of the camera.
- Connect the provided USB charging data cable to the camera's USB port.
- USB մալուխի մյուս ծայրը միացրեք USB սնուցման ադապտերին (չի մատակարարվում) կամ համակարգչի USB միացքին։
- Լիցքավորման ցուցիչի լույսը կվառվի։ Լրիվ լիցքավորվելուց հետո լույսը կփոխվի կամ կանջատվի։
Note: The camera has a built-in 750mAh lithium battery. Ensure the camera is fully charged before first use.
4.2 Հիշողության քարտի տեղադրում
The camera requires a small memory card (up to 64GB, not included) for storing photos and videos.
- Locate the memory card slot next to the USB port.
- Gently insert the memory card into the slot with the gold contacts facing the correct direction (refer to the diagram or markings on the camera).
- Push the card in until it clicks into place. To remove, push it in again until it springs out.
Caution: Do not force the memory card. Incorrect insertion may damage the card or camera.
5. Գործառնական հրահանգներ
5.1 Միացում/անջատում
- Միացնելու համար սեղմեք և պահեք կոճակը Open Key.
- Անջատելու համար սեղմեք և պահեք կոճակը Open Key կրկին.
5.2 Լուսանկարներ անելը
- Ensure the camera is in photo mode using the Ռեժիմի անջատիչ.
- Frame your shot using the 2.8-inch TFT screen.
- Սեղմեք Կափարիչի բանալի halfway down to activate autofocus. The focus indicator will appear.
- Սեղմեք Կափարիչի բանալի fully down to capture the photo.

Image: The Zopsc Digital Camera in silver, showcasing its compact design and front lens. This camera is capable of capturing 50MP images.
5.3 Տեսանյութերի ձայնագրում
- Switch to video mode using the Ռեժիմի անջատիչ.
- Սեղմեք Կափարիչի բանալի to start recording. A recording indicator will appear on the screen.
- Սեղմեք Կափարիչի բանալի կրկին ձայնագրումը դադարեցնելու համար:
5.4 Թվային մեծացման օգտագործումը
While in photo or video mode, use the Continuous Shooting/T Key/Upper Key to zoom in (Telephoto) and the Delete/Down Key to zoom out (Wide).
5.5 Activating LED Flashlight
In low light conditions, press the Fill Light/Right Key to turn the built-in LED flashlight on or off.

Image: A side-by-side comparison showing the effect of the built-in LED flash. The "Before" image is darker, while the "After" image, taken with the flash, is brighter and clearer, demonstrating its utility in low-light environments.
5.6 Auto Timer Function
To use the auto timer for self-portraits or group photos:
- Լուսանկարչական ռեժիմում սեղմեք Մենյու ստեղն.
- Navigate to the self-timer option using the arrow keys.
- Select your desired delay (2s, 5s, or 10s) using the Հաստատում Key.
- Սեղմեք Կափարիչի բանալի. The camera will count down before taking the picture.
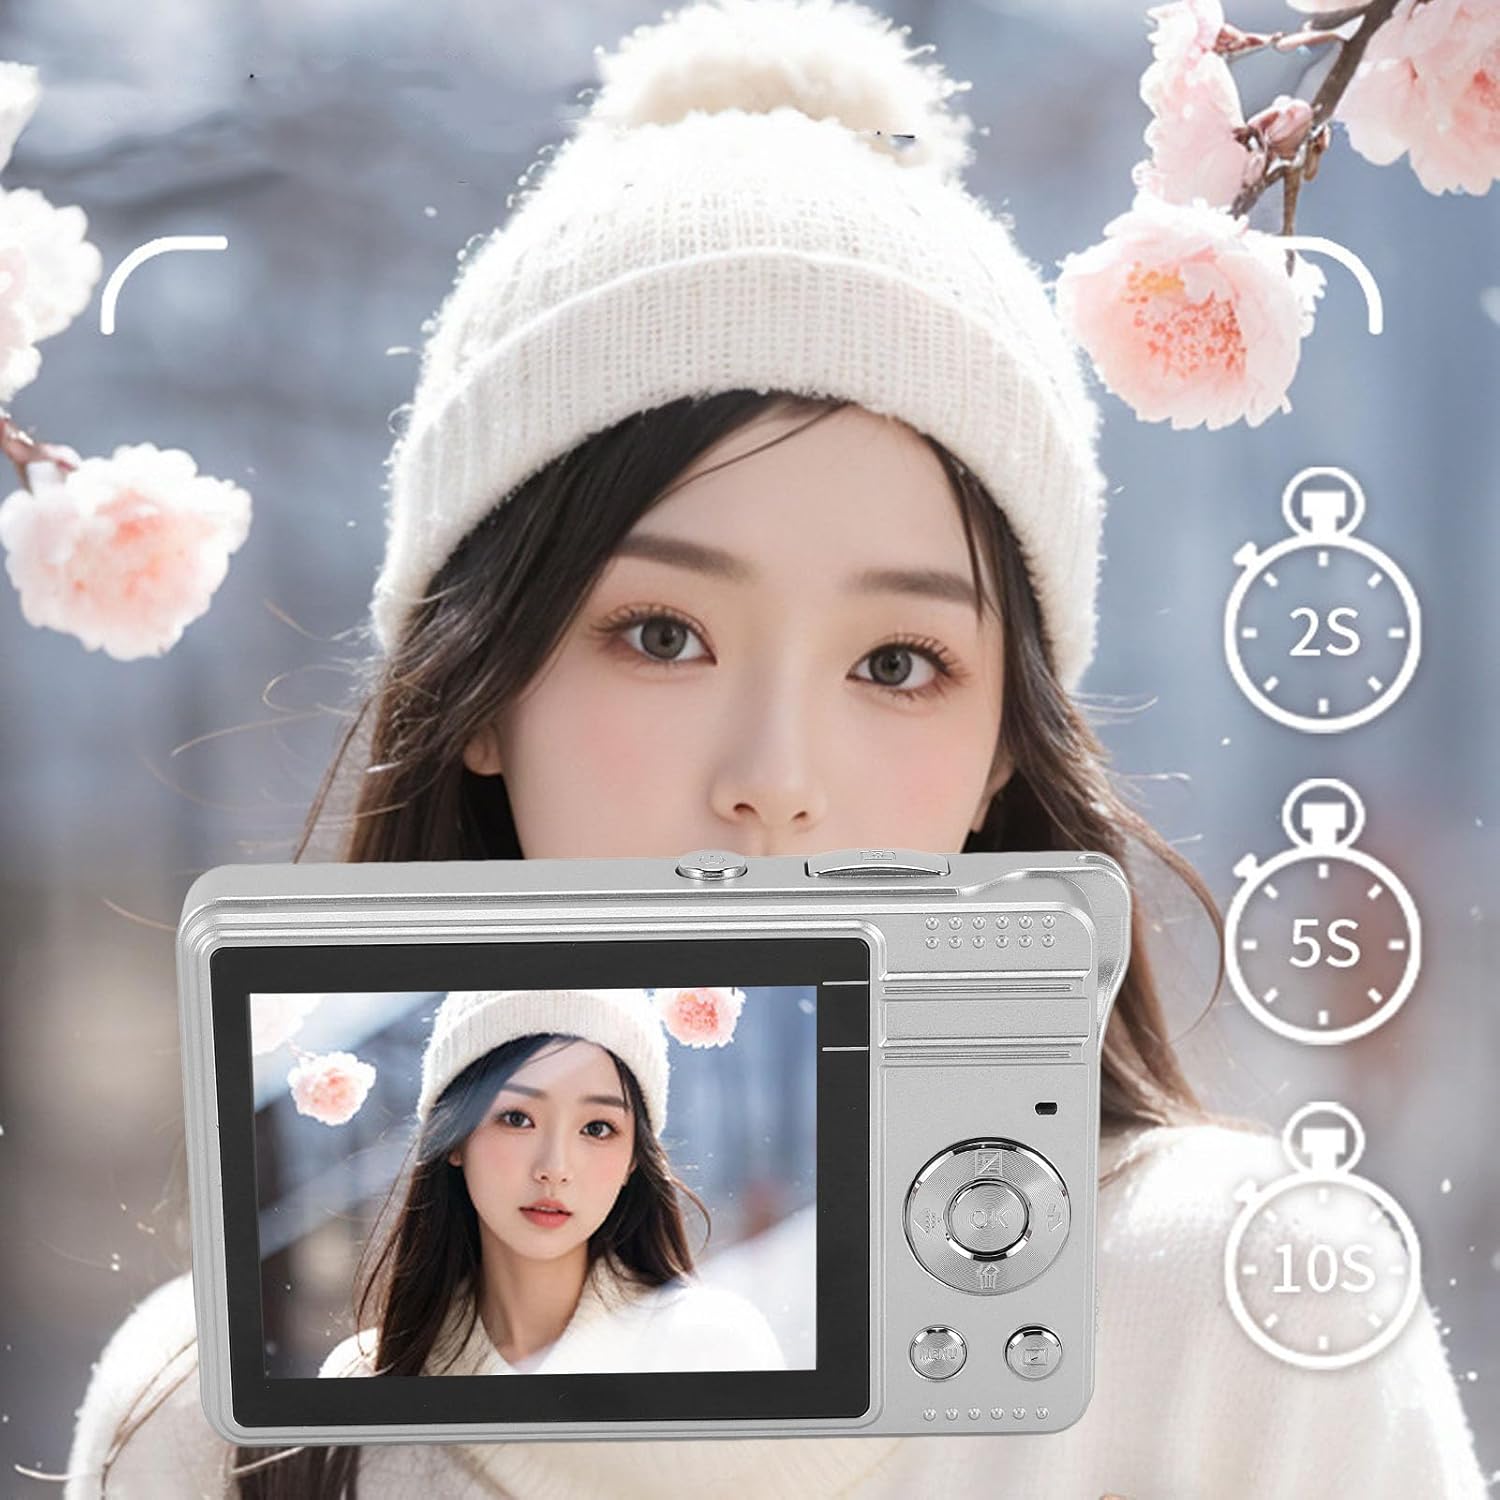
Image: The Zopsc Digital Camera held up, with the screen showing options for a 2-second, 5-second, or 10-second self-timer, indicating the camera's auto-timer functionality.
5.7 Նվագարկման ռեժիմ
Դեպի view ձեր նկարահանած լուսանկարներն ու տեսանյութերը՝
- Switch to playback mode using the Ռեժիմի անջատիչ.
- Use the arrow keys to navigate through your files.
- Սեղմեք Հաստատում Key դեպի view a video or a larger image.
- Ջնջել ա file, ընտրեք այն և սեղմեք Delete/Down Key, ապա հաստատեք:

Image: The Zopsc Digital Camera's screen showing a grid of six different filter effects applied to an image, demonstrating the camera's ability to shoot in various styles.
6. Պահպանում
6.1 Տեսախցիկի մաքրում
- Օգտագործեք փափուկ, չոր կտոր՝ տեսախցիկի մարմինը մաքրելու համար։
- For the lens and screen, use a specialized lens cleaning cloth and solution. Avoid abrasive materials.
- Do not use organic solvents or strong chemicals to clean the camera.
6.2 Պահպանում
- Պահեք տեսախցիկը զով, չոր տեղում՝ ուղիղ արևի լույսից և ծայրահեղ ջերմաստիճաններից հեռու։
- If storing for an extended period, ensure the battery is partially charged (around 50%) and recharge it every few months to prevent deep discharge.
- Use the provided carrying bag to protect the camera from dust and scratches.
6.3 Մարտկոցի խնամք
- Խուսափեք մարտկոցի հաճախակի լրիվ լիցքաթափումից։
- Մի՛ ենթարկեք մարտկոցը բարձր ջերմաստիճանների կամ ուղղակի ջերմության ազդեցությանը։
- If the battery performance significantly degrades, it may need replacement by a qualified service center.
7: Անսարքություն
| Խնդիր | Հնարավոր պատճառ | Լուծում |
|---|---|---|
| Տեսախցիկը չի միանում։ | Մարտկոցը սպառվել է։ | Charge the camera battery using the provided USB cable. |
| Հնարավոր չէ լուսանկարներ/տեսանյութեր անել։ | Memory card is full or not inserted correctly. | Insert a new memory card or delete unnecessary files. Ensure the card is properly seated. |
| Պատկերները մշուշոտ են: | Lens is dirty; camera shake; subject too close/far for autofocus. | Clean the lens. Hold the camera steady. Ensure subject is within autofocus range. |
| LED flash not working. | Flash is turned off; battery low. | Սեղմեք Fill Light/Right Key to activate. Charge the battery. |
| Տեսախցիկը կախվում է կամ չի արձագանքում։ | Ծրագրային ապահովման խափանում։ | Սեղմեք և պահեք կոճակը Open Key to force a shutdown, then restart the camera. |
8. Տեխնիկական պայմաններ
| Առանձնահատկություն | Մանրամասն |
|---|---|
| Մոդելի անվանումը | Zopscqx4w6gnfpa-12 |
| Պատկերի առավելագույն լուծում | 50 պատգամավոր |
| Տեսանյութի առավելագույն լուծում | 1980x1080 (1080P) at 30 FPS |
| Էկրանի չափը | 2.8 դյույմ TFT |
| Թվային խոշորացում | 16x |
| Պահպանում | Supports small memory card up to 64GB (not included) |
| Մարտկոցի տեսակը | Built-in Lithium battery, 750mAh |
| File Ձևաչափ | JPEG (images), MP4 (videos) |
| Պատկերի կայունացում | Թվային |
| Ֆլեշ | Ներկառուցված LED լապտեր |
| Կափարիչի նվազագույն արագություն | 0.001 վայրկյան |
| Լուսավորման վերահսկում | Ավտոմատ |
| Ֆոկուսի տեսակը | Ավտոմատ ֆոկուս |
| Միացում | USB |
| Ջրի դիմադրության մակարդակը | Ջրակայուն չէ |
9. Երաշխիք և աջակցություն
This product comes with a standard manufacturer's warranty. Please refer to the warranty card included in your package for specific terms and conditions, including warranty duration and coverage details.
For technical support, troubleshooting assistance, or warranty claims, please contact Zopsc customer service through the retailer where you purchased the product or visit the official Zopsc brand store online:
Please have your model number (Zopscqx4w6gnfpa-12) and purchase information ready when contacting support.