1. Ներածություն
This manual provides detailed instructions for the Kymate USB Programming Cable, Model RPC-H780-U. This cable is designed to facilitate programming and configuration of various Hytera handheld radios, including models in the PD7 series and PD985. It ensures reliable data transfer between your computer and the radio for efficient management of radio settings.
Նշում. This product includes the programming cable and a CD with the necessary USB driver. Programming software for your Hytera radio is not included and must be obtained separately from Hytera or an authorized dealer.
2. Փաթեթի բովանդակությունը
- 1 x Kymate USB Programming Cable (Model RPC-H780-U)
- 1 x CD with USB Driver
3. Կարգավորում և դրայվերի տեղադրում
Before connecting the programming cable to your computer and radio, it is essential to install the USB driver. The driver is compatible with a wide range of operating systems.
3.1. Համակարգի պահանջներ
- Օպերացիոն համակարգեր. Windows 2000, Windows XP, Windows Server 2003, Windows Vista, Windows Server 2008, Windows 7, Windows 8, Windows 10 (32-bit and 64-bit versions), Mac OS.
- Հասանելի USB միացք։
3.2. Driver Installation Steps
- Insert the provided driver CD into your computer's CD/DVD drive.
- Navigate to the CD drive and locate the driver installation file (e.g., setup.exe or a folder containing drivers).
- Run the installer and follow the on-screen prompts to complete the driver installation. Administrator privileges may be required.
- Once the driver installation is complete, you may be prompted to restart your computer. It is recommended to do so to ensure proper driver loading.
- After restarting, connect the USB-A end of the programming cable to an available USB port on your computer. The operating system should recognize the new hardware and assign a COM port.
- Verify the COM port assignment in your computer's Device Manager (Windows) or System Information (Mac) under "Ports (COM & LPT)" or similar. Note this COM port number as it will be needed for the programming software.

Figure 1: USB-A Connector
This image shows a close-up of the USB-A connector, which plugs into your computer's USB port.
4. Գործառնական հրահանգներ
Once the driver is installed and the cable is connected to your computer, you can proceed to connect it to your Hytera radio and use the programming software.
4.1. Connecting to the Radio
- Ensure your Hytera radio is powered off before connecting the cable.
- Locate the programming port on your Hytera radio. This is typically a multi-pin connector on the side of the radio, often covered by a protective flap.
- Carefully align the multi-pin connector of the programming cable with the radio's programming port.
- Gently push the connector firmly into the radio's port until it is securely seated. Do not force the connection.
- Once connected, you can power on your Hytera radio.

Figure 2: Radio Connector End
This image displays a close-up of the multi-pin connector designed to interface with Hytera radios.
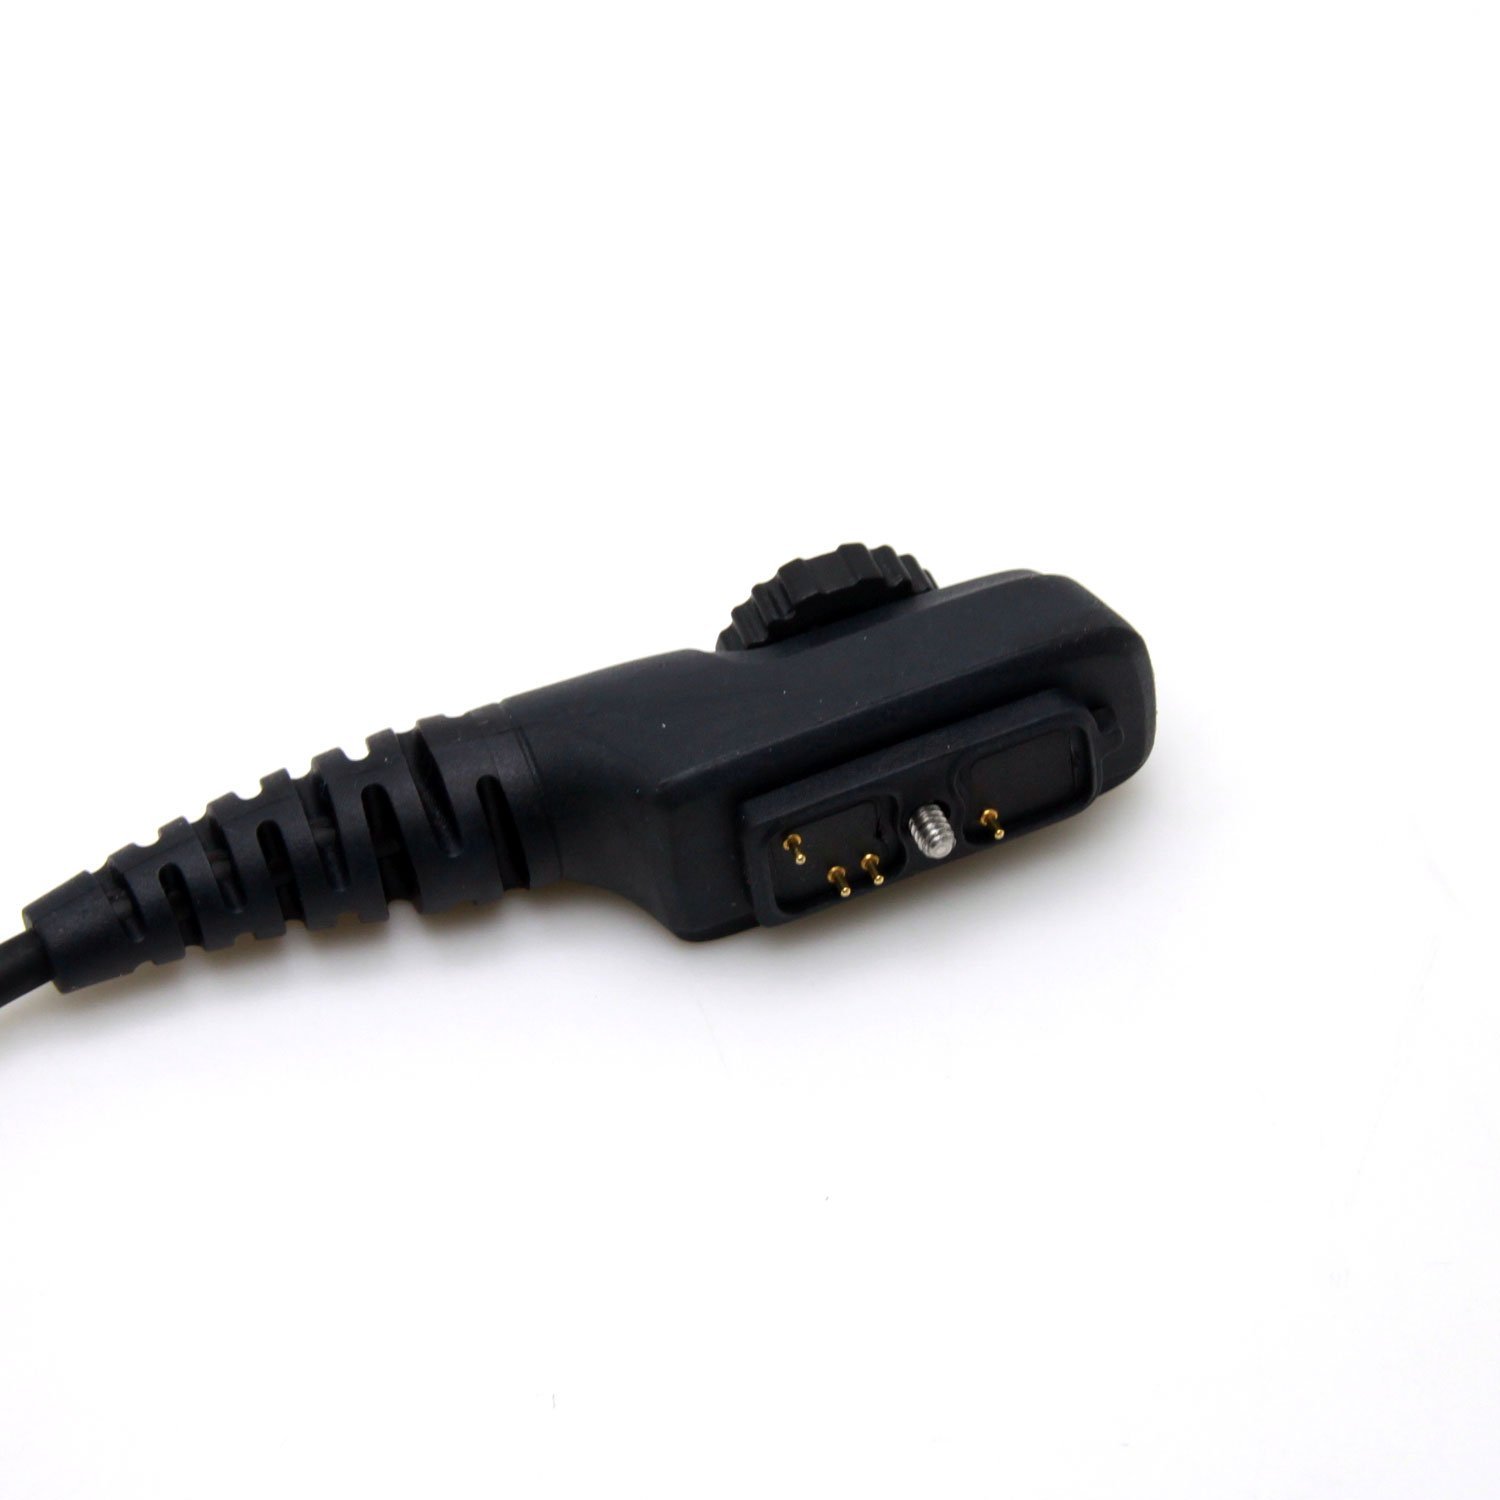
Figure 3: Radio Connector Pins
Այս պատկերը մանրամասն պատկեր է տալիս view of the pins on the radio connector, ensuring proper alignment with the radio's port.
4.2. Using Programming Software
With the cable connected to both your computer and radio, launch the Hytera programming software (not included with this cable).
- Open your Hytera radio programming software.
- In the software's settings or communication port configuration, select the COM port number that was assigned to the USB programming cable (as identified in Device Manager).
- Follow the instructions within the programming software to read data from the radio, write new configurations, or update firmware.
- Always ensure the connection is stable and do not disconnect the cable during a read/write operation to prevent data corruption.

Figure 4: Complete Programming Cable
This image shows the entire Kymate USB Programming Cable, highlighting its length and overall design.
5. Պահպանում
- Պահեք մալուխը զով, չոր տեղում՝ ուղիղ արևի լույսից և ծայրահեղ ջերմաստիճաններից հեռու։
- Avoid bending or kinking the cable sharply, especially near the connectors, to prevent internal wire damage.
- Keep the connectors clean and free from dust or debris. Use a soft, dry cloth to wipe them if necessary.
- The cable features a high-quality diameter PU cable, designed to be tangle-free. Handle with care to maintain this feature.
6: Անսարքություն
- Cable Not Recognized by Computer:
Ensure the USB driver is correctly installed. Try connecting the cable to a different USB port on your computer. Restart your computer. Check Device Manager for any driver errors. - Programming Software Cannot Detect Radio:
Verify that the correct COM port is selected in the programming software. Ensure the cable is securely connected to both the computer and the radio. Confirm the radio is powered on. Check if the radio model is compatible with the programming software and cable. - Error During Read/Write Operation:
Do not disconnect the cable during an operation. Ensure the radio's battery is sufficiently charged. Close any other applications that might be using the COM port.
7. Տեխնիկական պայմաններ
| Առանձնահատկություն | Մանրամասն |
|---|---|
| Մոդելի համարը | RPC-H780-U |
| Բրենդ | Kymate |
| Մալուխի տեսակը | USB ծրագրավորման մալուխ |
| Միակցիչի տեսակը (համակարգիչ) | USB տեսակ A |
| Միակցիչի տեսակը (ռադիո) | Multi-pin (PC38 type) |
| Մալուխի երկարությունը | 1 մետր (3.3 ոտնաչափ) |
| Համատեղելի օպերացիոն համակարգեր | Windows 2000, XP, Server 2003, Vista, Server 2008, 7, 8, 10 (32/64-bit), Mac OS |
| Compatible Hytera Radios | PD700, PD700G, PD708, PD702G, PD780, PD780G, PD788, PD782, PD705, PD705G, PD785, PD785G, PD790Ex, PT580, PT580H, PD702, PD752, PD752G, PD782G, PD792 Ex, PD982, UL913 |
| Հատուկ առանձնահատկություններ | Tangle-free PU cable |
8. Երաշխիք և աջակցություն
For warranty information or technical support regarding your Kymate USB Programming Cable, please refer to the documentation provided with your purchase or contact Kymate customer service directly. Contact details are typically available on the manufacturer's official webկայքում կամ ձեր գնման կետի միջոցով։
Նշում. This product does not include programming software for Hytera radios. Support for radio programming software should be directed to Hytera or the software vendor.
9. Պաշտոնական արտադրանքի տեսանյութեր
Վաճառողի կողմից ներկայացված որևէ պաշտոնական ապրանքի տեսանյութ չի հայտնաբերվել, որը համապատասխանի այս ձեռնարկում ներառելուն։


